Please check the following for the points to pay attention to when creating Photo goods.
→Attention
Make Photo goods!
Decide which Photo goods you want to create
Tap the [Create New] button on the TOP page. Select the Photo goods you want to create.
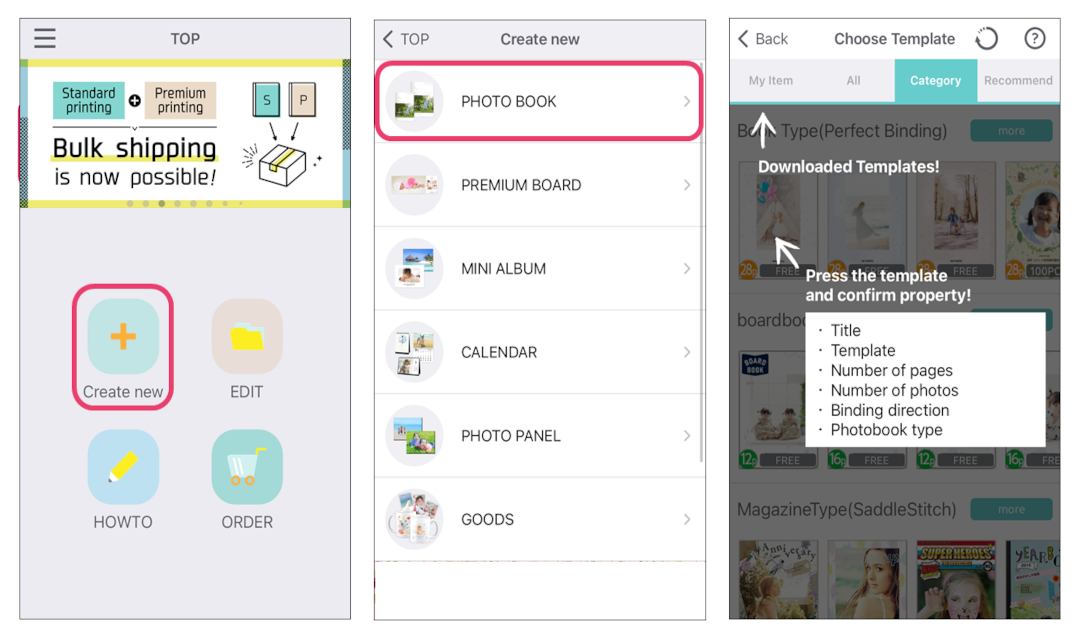
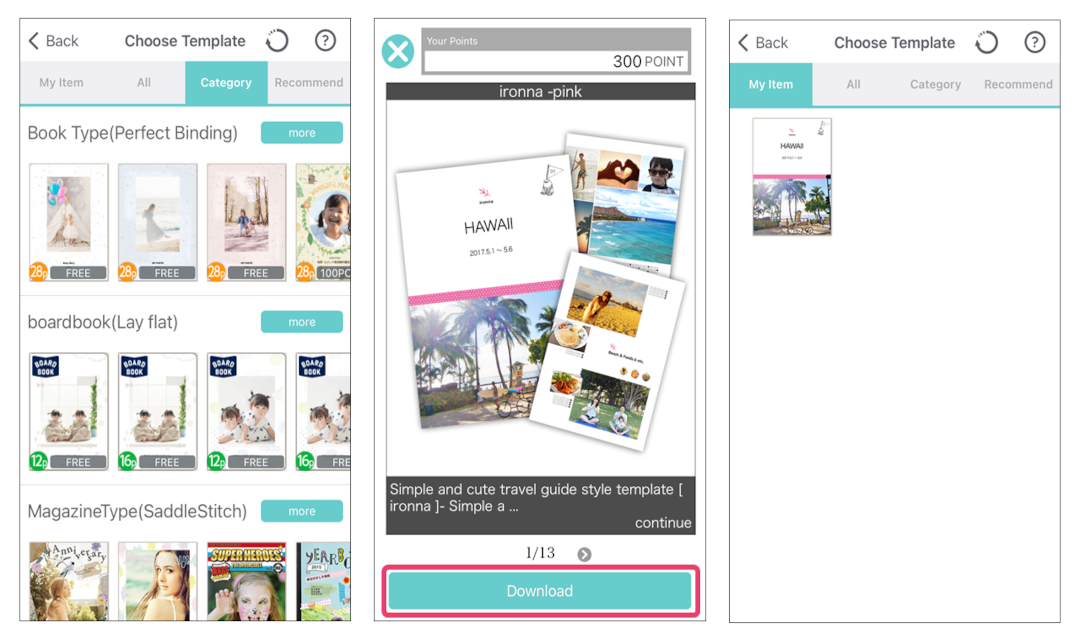
Select a template(example:Photobook)
Select and tap the template design you want to create. Download the template design. Once the download is complete, it appears in “My Item”.
Make Photo goods (SIMPLE)
Tap the [Create Photobook] button and select the mode. With SIMPLE mode, you can select photo and letters following the instructions.
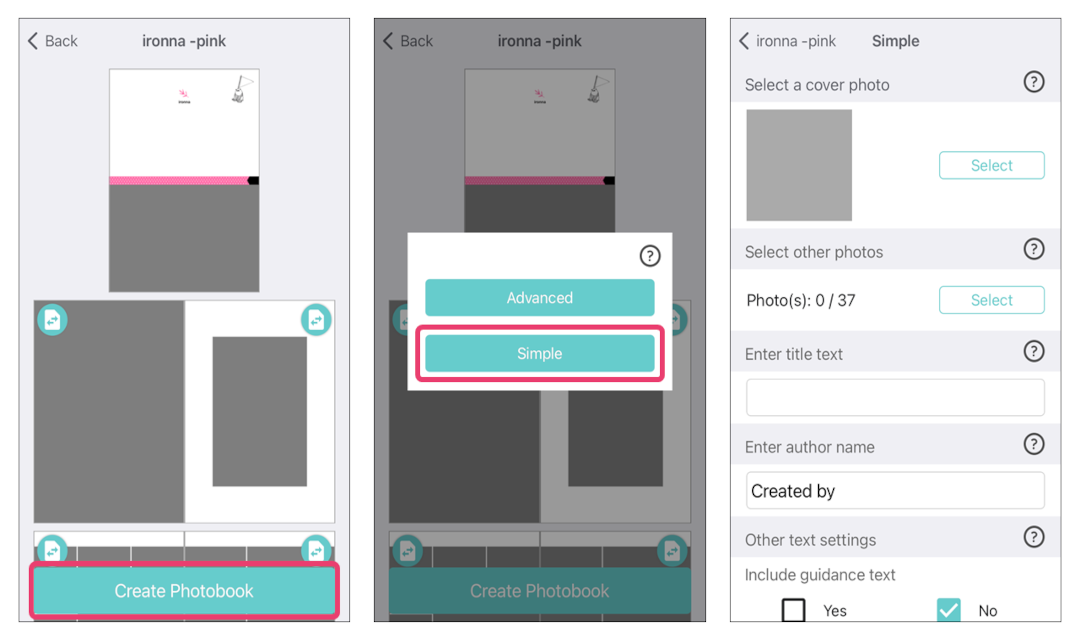
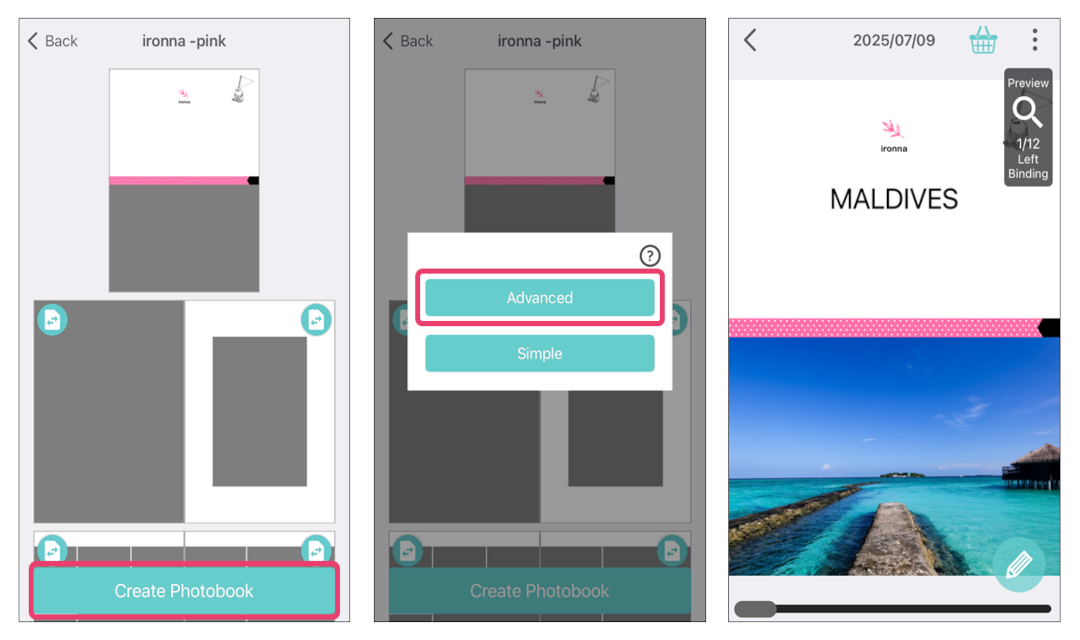
Make Photo goods (ADVANCED)
Tap the [Create Photobook] button and select the mode. With ADVANCED mode, you can select photo and letters for each page.
Edit your Photo goods
Tap the pencil icon and edit each page. You can select photo, letters and background colors. Once you have finished editing, tap the basket icon on the right top and tap the [Order] button.
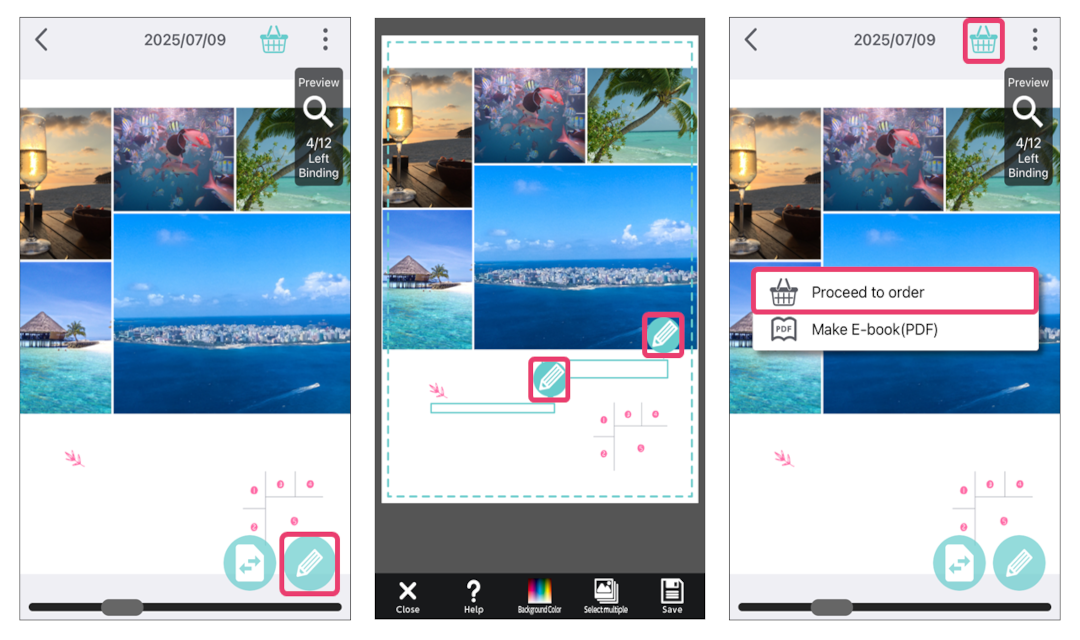
Preview to verify and then order
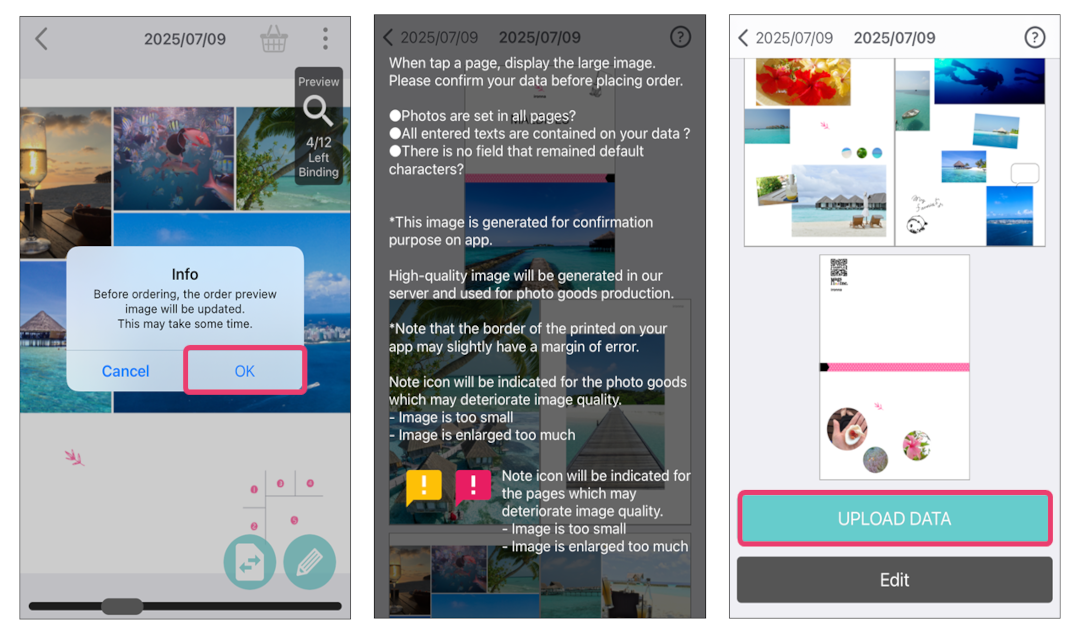
Preview the content of the Photobook to verify and then order.
●Are all photos set?
●Are any letters overflowing?
●Are any letters left as default?
* If there is page in which the image quality may deteriorate, there will be an attention icon. Please consider changing picture if there is an attention icon.
* Images displayed on preview is only for verification of the photo selection. For the Photobook, high-resolution image will be used.
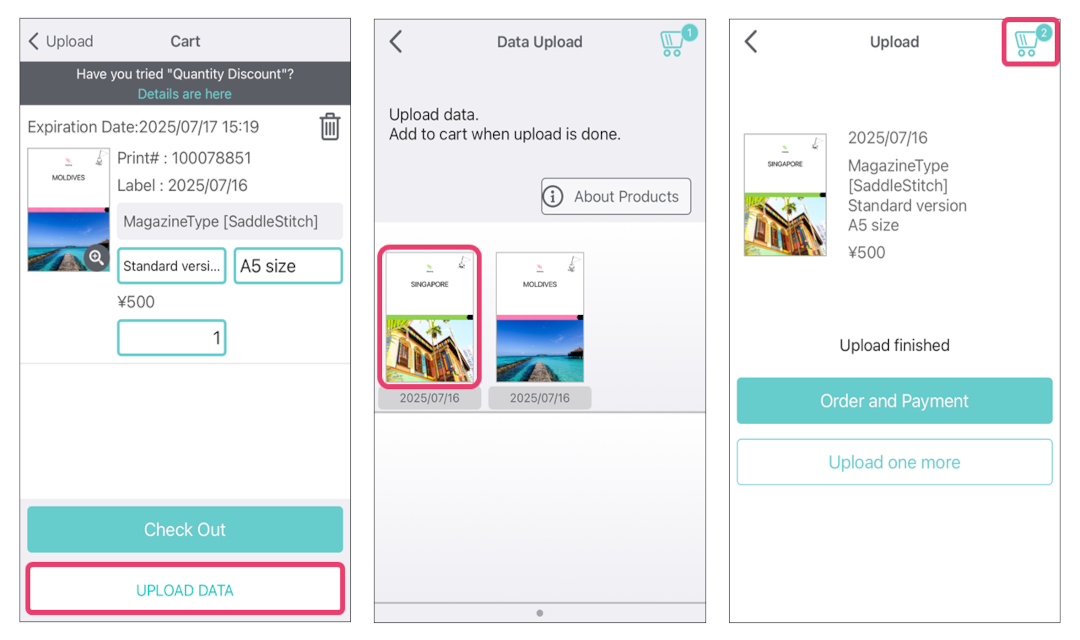
Once you’ve confirmed all the content, scroll the page and tap [UPLOAD DATA] button.
Select the specs of the Photobook
Select the specs, print quality and size of the Photobook. * Choices may vary depending on the product specifications and the template.
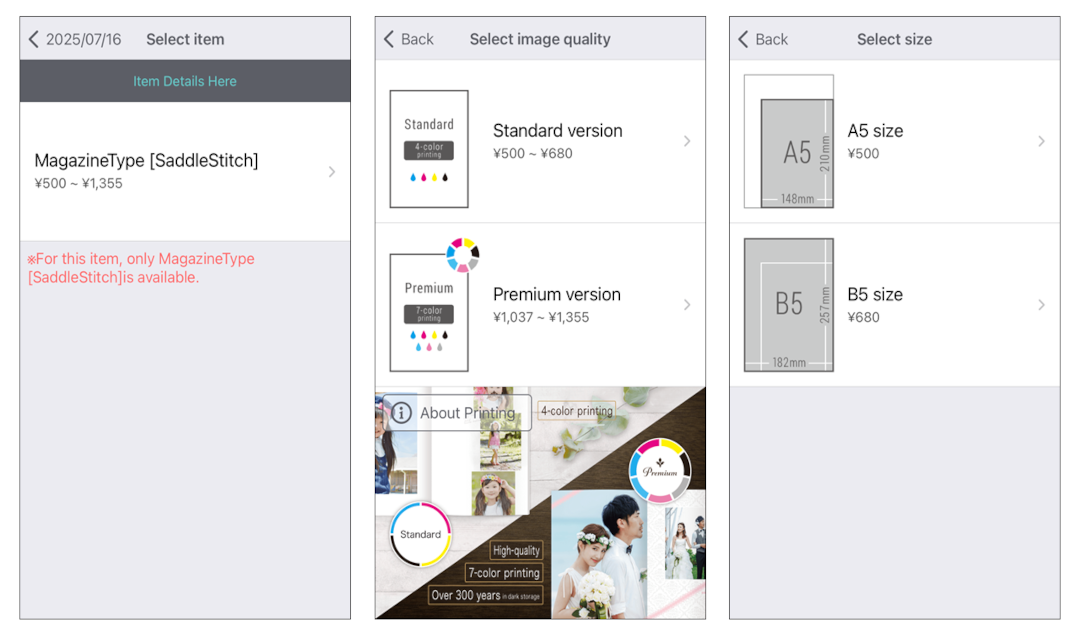
See here (Premium photo board Specs)
Check the precaution and upload
The background part with grey will be printed in grey. If there is a page with no photo, please verify the Photobook again using [Check data] button.
* If you prefer to print as is, check the [Print this data] button and then tap [upload] button.
* Uploading may take some time.
Please verify print quality, size and the number of Photobook and then tap [Order and Payment] button.
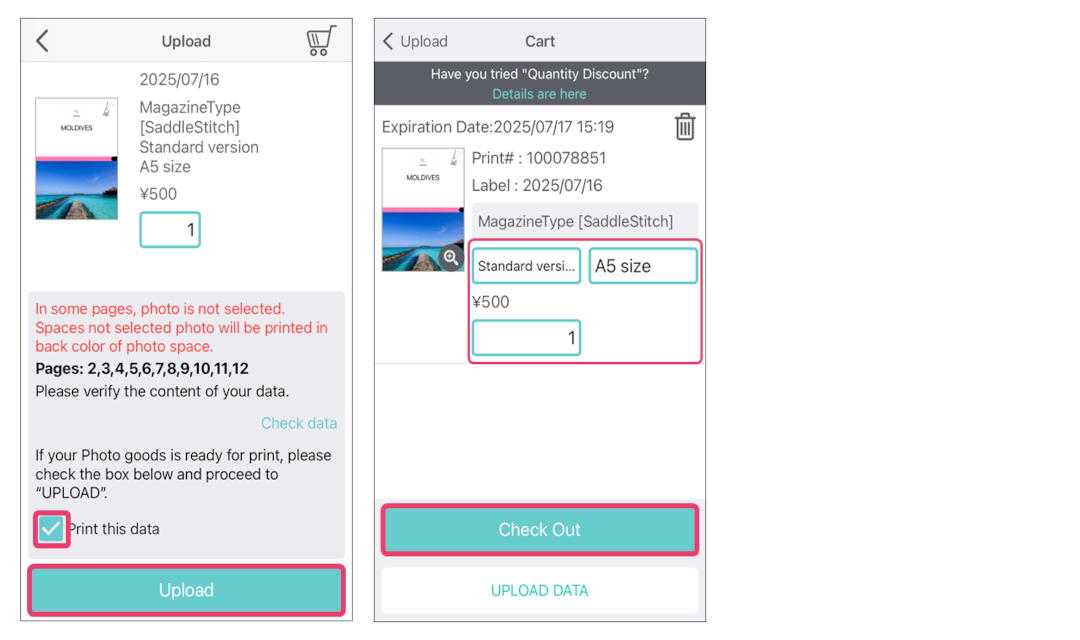
In case you want to order products with different content, you can upload one after another.
After the first upload is done, please tap the [UPLOAD DATA] button and select the product.
Verify the preview screen and then tap [Order].
* Once the upload is completed, the number of the shopping cart will be 2.
* You can also upload from the [Order] button at the top page.
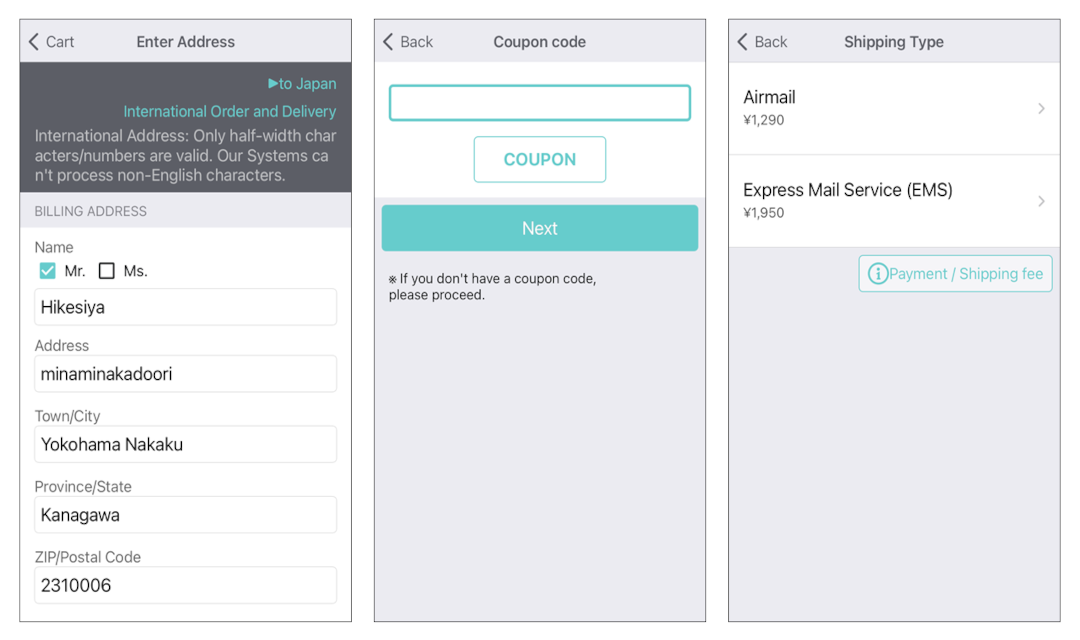
Enter information for delivery etc.
Please enter the customer's information and delivery address. If you wish to use a coupon, please enter the coupon number. If you do not have a coupon, please tap the [Next] button.
Depending on the number of order and the products, the available delivery choices will be displayed. Please select at your convenience.
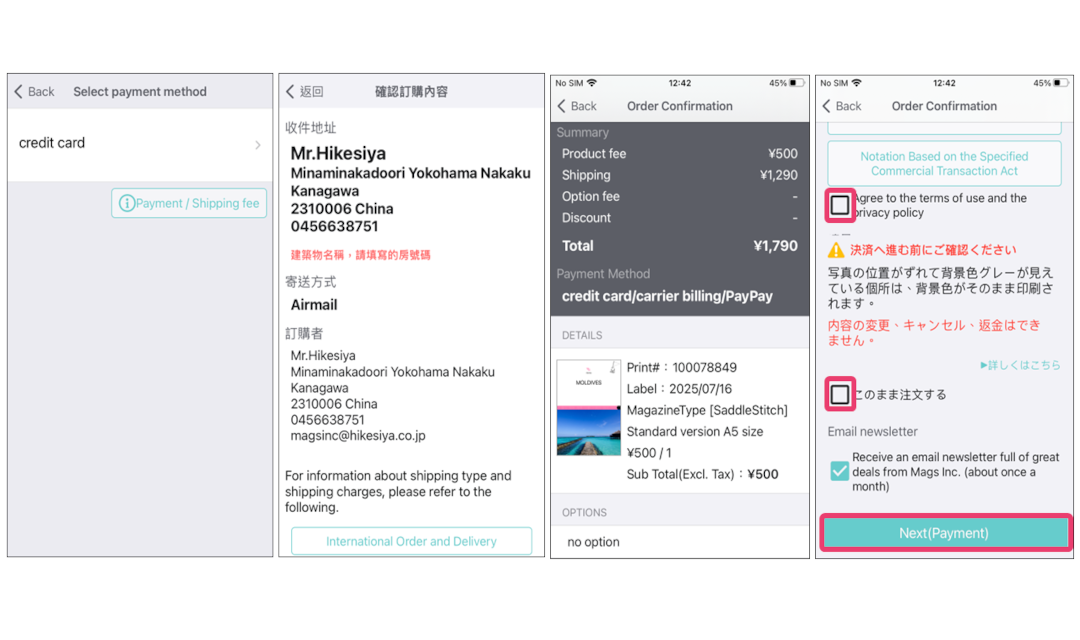
Enter payment information and order
Please select the payment method. Verify the order content and agree to Terms of Use and Privacy Policy to proceed to payment. Once you tap the [Payment] button, the order is complete. Please wait for the arrival of your product.
Attention & Tips to make it better
■AttentionDon't delete your photo before you order!
The original photo data is necessary when ordering a bookbind.
Use a bright photo
Colors are displayed differently on smartphones and printers(RGB→CMYK). When printed, it may look slightly darker than on the screen.
Use a proper-sized picture
"Followings are the recommendation for pictures for Photobook
Image size: larger than 960×1,280 px
Format: jpg, png
Color mode: RGB"RGB
Recommended picture size to put in an expanded photo page is as below:
Photobook(Magazine Type/Book Type) : 2,122 x 2,976 px
Mini Album : 2,453 x 1,750 px
* Larger pictures than above can be used but does not affect the products quality.
* The printed Photobook won’t be very beautiful if you use pictures smaller than recommended size.
Change the layout
- Photos do not fit into frames (you want to set the photo as landscape although template frame is portrait and vice versa)
- Too few photos to set (some frames are empty)
- Too many photos to set (need more frames)
If you have these problems, try page layout change. In each option pages, you can choose the photo frame page fitting your favorite photo.
If there is no [Change Layout] button, it means such layout cannot be edited.
Select a font
Use your preferred font according to the design. For the notebook design, handwritten style fonts are recommended.
Set a background color
When there's a mismatch between the frame and photo which creates a blank space, it will be less noticeable after you set the background color.
Cloud sharing&ordering
You can share the photo book you created with your friends and they can also directly purchase photobooks online.
Register as a creator
Mags Inc.Once you register as a Mags Inc. creator, you can sell your product.